iOS Tutorials

After working on Android on a daily basis for almost 1 year, I started out my journey on iOS to discover the other major half of the mobile world. I followed a few different resources to help me understand different things on iOS dev, mainly Objective-C and the Xcode IDE. This blog post will include a list of tutorials I used and highlight what they are good for. This is to keep a note to myself of useful resources, and at the same time, I hope it will be useful to others too! 🙂

  • Official getting started guide
  • About Objective-C method and function
  • An Overview of Objective-C
    • Website: http://cocoadevcentral.com/d/learn_objectivec/
    • Remarks: Good overview of Objective-C. Also explains well on memory management. Objects creation can be confusing when you’re new to Objective-C. I saw 2 ways of making objects: “NSString* string1 = [NSString string];” and “NSString* string2 = [[NSString alloc] init];”. This guide will help you demystify it and learn more about memory management in Objective-C.

Some other guides I found but yet to finish:

That’s it for now, more to be added to this list as I study! bye!


Troubleshooting Postgres Error: Permission denied to create db

Today I tried to setup Postgres as my db for my Rails project, and met with this error:

Couldn't create database for {"adapter"=>"postgresql", "encoding"=>"unicode", "database"=>"my_cute_db", "pool"=>5, "username"=>"rongjun", "password"=>nil}
PG::Error: ERROR:  permission denied to create database

I want to write down how I solved it.

What I intended to do is the create a db called my_cute_db with rake command, rake db:setup. However, it’s giving error like shown above.

Here’s my database.yml

development:  
adapter: postgresql  
encoding: unicode  
database: my_cute_db  
pool: 5  
username: rongjun  
password:

My username is rongjun. And the error is telling me that “permission denied to create database“, so I have to go into psql command-line interface to find out the permission of my role.

my_terminal# psql postgres
postgres=# \du
                              List of roles
 Role name  |                   Attributes                   | Member of
------------+------------------------------------------------+-----------
 rongjun    |                                                | {}
 daodaowang | Create DB                                      | {}
 kai        | Password valid until infinity                  | {}
 tanjunrong | Superuser, Create role, Create DB, Replication | {}
 validator  |                                                | {}

\du command is listing down the role names and their privileges. We can see that rongjun is not having any privileges. On the other hand daodaowang is able to Create DB. Now we would like to enable rongjun to be able to Create DB just like daodaowang.

postgres=# ALTER ROLE rongjun WITH CREATEDB;

Then we run \du again to check:

postgres=# \du
                              List of roles
 Role name  |                   Attributes                   | Member of
------------+------------------------------------------------+-----------
 rongjun    | Create DB                                      | {}
 daodaowang | Create DB                                      | {}
 kai        | Password valid until infinity                  | {}
 tanjunrong | Superuser, Create role, Create DB, Replication | {}
 validator  |                                                | {}

rongjun is now having the correct privilege to Create DB. Let’s run rake db:create again, it will do the job without error now. You can check by running psql -l command to list down all databases you have.

After creating the db, you can grant more privileges to your user:

postgres=# GRANT ALL PRIVILEGES ON DATABASE my_cute_db to rongjun;

Reference:
For how to create database refer to: http://www.cyberciti.biz/faq/howto-add-postgresql-user-account/

For creating the user with ‘Create DB’ privilege directly without having to ALTER it later:

create user any_username with password 'any_password' createdb;

% notation in Ruby

Today I wanna share about the %notation I learned.

Any single non-alpha-numeric character can be used as the delimiter.

1.9.3-p327 :005 > %*lala lala "hehe"*
 => "lala lala \"hehe\""
1.9.3-p327 :006 > %&lala lala "hehe"&
 => "lala lala \"hehe\""

As you can see, * worked, & worked, so other symbol and friends will work too. Above example is using % notation to produce string, but % notation is actually more powerful than that, you can use it to produce array, regexp, shell command:


%Q{one\ntwo\n#{ 1 + 2 }}
=> "one\ntwo\n3"

%q{one\ntwo\n#{ 1 + 2 }}
=> "one\\ntwo\\n#{ 1 + 2 }"

%r/#{name}/i
=> /nemo/i

%w{one two three}
=> ["one", "two", "three"]

%i{one two three} # after Ruby 2.0
=> [:one, :two, :three]

%x{ruby --copyright}
=> "ruby - Copyright (C) 1993-2009 Yukihiro Matsumoto\n"

The post is not an exhaustive guide, but an introduction. Here’s where I copied the material from: http://en.wikibooks.org/wiki/Ruby_Programming/Syntax/Literals#The_.25_Notation

Take a tour to % notation through the link if you haven’t, it is definitely beneficial!

If you’re familiar with test, you can try the examples written in minitest:
https://github.com/teohm/a-dip-in-ruby/blob/master/spec/percent_notation_spec.rb

It’s from this blog post: http://teohm.github.io/blog/2012/10/15/start-using-ruby-percent-notation/

It’s a tiring day… It’s time to get some rest! Good night 🙂

Ruby’s alias_method

Today I learned about an interesting method in Ruby alias_method, this method can be used to refer to an old method in a module. The documentation is here: http://apidock.com/ruby/Module/alias_method. But at first glance, I couldn’t understand what it’s used for. So this simple post will illustrate a little.

Let’s say we have a module initially:

module Mod
  def print_asdf
    puts "lalalala"
  end
end

We can use it like this:

irb> include Mod
 => Object
irb> print_asdf
  lalalala

Later we decided to reopen the module and overwrite the function to add something:

module Mod
  def print_asdf
    print_asdf
    puts "changed"
  end
end

It’s just like calling the superclass method when we’re doing inheritance in OOP, but for this case we can’t use super.print_asdf, if we call the above method, we’ll run into error:

irb> include Mod
irb> print_asdf
SystemStackError: stack level too deep
   from /Users/tanjunrong/.rvm/rubies/ruby-1.9.3-p327/lib/ruby/1.9.1/irb/workspace.rb:80
Maybe IRB bug!

That’s because it’s running recursively! This can be solved by alias_method:

module Mod
  alias_method :hey, :print_asdf

  def print_asdf
    hey
    puts "hehe"
  end
end

Now we can use it properly:

irb> include Mod
irb> print_asdf
  lalalala
  hehe

Simple post. Bye!

Git Cherry Pick

Today, I learned about git cherry-pick. The man page of cherry-pick states that:

Given one existing commit, apply the change the patch introduces, and record a new commit that records it. This requires your working tree to be clean (no modifications from the HEAD commit).

One of the use case I know of is to take a commit from one branch, and apply it on another. Given this,

- a - b - c - d - e - f (master)
            \
              g - h - i (dev)

and if I do this:

git checkout dev
git cherry-pick [SHA-1 hash of commit f]

I will have this:

- a - b - c - d - e - f (master)
            \
              g - h - i - f"(dev)

Now I will have another commit f” with a different SHA-1 hash from commit f.


However, take note that there are consequences of cherry-picking. The history in commit d and commit e will be lost. Consider a simpler tree:

- a - b - c (master)
    \
      d (dev)

Referring to the simple tree above, let’s say we introduce cheese_cake_recipe.txt in commit b with the content:

get_recipe() {
  return "cheese + flour + lime juice"
}

and changes the content of cheese_cake_recipe.txt in commit c into:

get_recipe() {
  return "cheese + flour + milk"
}

later I cherry-pick it from the (dev) branch like this:

git checkout dev
git cherry-pick [SHA-1 hash of commit c]

now I have this:

- a - b - c (master)
    \
      d - c" (dev)

But in commit c”, the content of cheese_cake_recipe.txt will be:

get_recipe() {
  return "cheese + flour + milk"
}

And we never know that lime juice ever exist in the older recipe, now our cheesecake won’t taste as nice and we won’t be able to find out why easily.

So use with care… Here are 2 posts talking about this:

http://stackoverflow.com/questions/880957/pull-all-commits-from-a-branch-push-specified-commits-to-another/881014#881014

http://stackoverflow.com/questions/881092/how-to-merge-a-specific-commit-in-git/881112#881112

Continue a task using Thread after render has returned

As rails is an opinionated framework, it uses the MVC pattern. Whenever it receives a request, it will go through a controller and the controller will render a page to be returned.

def index
    render :action => :index
end

However, sometimes we have to run a longer task.

def index
    # some time consuming task
    render :action => :index
end

When we met with this situation, this browser will be in the loading-forever mode, and the server might even timeout the connection. One of the way to solve it is to render a view for the user first, telling them “your request is running at the background”, then we continue on our long process. So this is how it’s done:

def index
    Thread.new do
        # some time consuming task
    end
    render :action => :index
end

This way, the web app will spawn another thread for the long task, so the view will be returned to the user first, and the long task will still be executed at the background.

However, if the long running task is too heavy, we can use delayed_job or resque to queue up the job for background execution.

How to Fetch Facebook Graph Data with Go

I wrote a script using Go to fetch information on Facebook through their Graph API. So I want to blog about how I do it. First of all, if you’re unfamiliar with Facebook graph, we can see the information using a browser: http://graph.facebook.com/android.

A Json object will be returned:

{
   "id": "350685531728",
   "name": "Facebook for Android",
   "description": "Keep up with friends, wherever you are.",
   "category": "Utilities",
   "subcategory": "Communication",
   "link": "http://www.facebook.com/apps/application.php?id=350685531728",
   "namespace": "fbandroid",
   "icon_url": "http://static.ak.fbcdn.net/rsrc.php/v2/yo/r/OKB7Z2hkREe.png",
   "logo_url": "http://photos-b.ak.fbcdn.net/photos-ak-snc7/v43/207/227200684078827/app_115_227200684078827_474764570.png",
   "company": "Facebook"
}

Let’s start with the Go code. First, we need to fetch the content using the http.Get method from  the “net/http” package. After that, we need to close the response body when it is done. More about defer can be found here

resp, err := http.Get("http://graph.facebook.com/android")
defer resp.Body.Close()

Then we read from the resp(response) into body. More about ReadAll.

body, err := ioutil.ReadAll(resp.Body)  

    fmt.Println("resp.Body: ", resp.Body)   
    fmt.Println("body: ",string(body))
    fmt.Println("err: ",err)

After that, we need to unmarshal the the bytes[] (body) of data into a data structure so that we can use the data. This is a little tricky, so let me explain a bit. For a Json object that look like this:

{
    Name: "Alice"
    Body: "Hello",
    Time: 1294706395881547000,
}

We need to prepare a data structure like this:

type Message struct {
    Name string
    Body string
    Time int64
}

Therefore, in our case, the graph API return a Json that look like this:

{
  "id": "350685531728",
   "name": "Facebook for Android",
   "description": "Keep up with friends, wherever you are.",
   "category": "Utilities",
   "subcategory": "Communication",
   "link": "http://www.facebook.com/apps/application.php?id=350685531728",
   "namespace": "fbandroid",
   "icon_url": "http://static.ak.fbcdn.net/rsrc.php/v2/yo/r/OKB7Z2hkREe.png",
   "logo_url": "http://photos-b.ak.fbcdn.net/photos-ak-snc7/v43/207/227200684078827/app_115_227200684078827_474764570.png",
   "company": "Facebook"
}

So we need to prepare a data structure like this:

type Graph struct {
    Id string
    Name string
    Description string
    Category string
    Subcategory string
    Link string
    Namespace string
    Icon_url string
    Logo_url string
    Company string
}

*Please take note of the upper case of the first letter, it is important! See Exported Identifiers.

Finally we can use the data structure for the unmarshalling:

    var g Graph
      err = json.Unmarshal(body, &g)
    if err == nil {
      fmt.Println("graph: ", g)
    } else {
      fmt.Println("graph error: ",err) // <---error at this line
    }

Now, we can use g whichever way we like after that! 🙂

Here’s the complete and running (but messy :P) code:
https://github.com/worker8/go-lab/blob/master/fetching_graph.go

Transaction class method of Active Record

Today I’m working on my rails project at work as usual, and met with a scenario that needs me to update a model by deleting and saving it in one go. So I learned that there is  a way of doing it by using the transaction class method from ActiveRecord.

It is very simple to use, you simply need to place the desired active record functions as a block argument into the transaction method like such:

Account.transaction do
  balance.save!
  account.save!
end

By using this way, SQL statements will only become permanent if they can all succeed as one atomic action, so it is safe to make a series of active record interactions without worrying that it will fail half way, and left you in an undetermined and hard-to-debug state.

First experience with TDD and pair programming

Conway’s Game of Life in Code Retreat
Last weekend I went to the Code Retreat Event in Singapore. The event promotes on TDD and pair programming. In the event, we work on something called Conway’s Game of Life. It is a no player game, the game just evolves by itself from it’s initial state, and it has 4 rules, and so on… It’s easier to just show it:


Above is the Conway’s game of life coded with a special initial state that is able to reproduce “glider spaceships” on and on. If you wonder what’s a spaceship, this is a single spaceship:


The interesting thing about Conway’s game of life is the fact that it can produce interesting patterns based on just simple rules:
1. Any live cell with fewer than two live neighbours dies, as if caused by under-population.
2. Any live cell with two or three live neighbours lives on to the next generation.
3. Any live cell with more than three live neighbours dies, as if by overcrowding.
4. Any dead cell with exactly three live neighbours becomes a live cell, as if by reproduction.

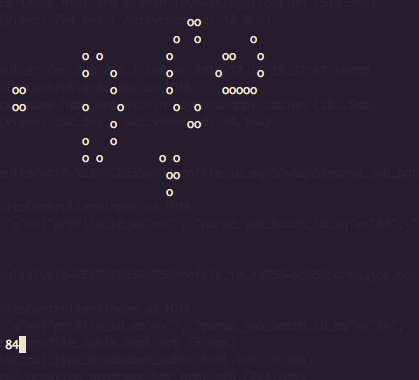
Given only 45 mins each session to code the game of life, and we’re supposed to throw away the code after every session. It’s quite impossible to finish the code (for most of the people), however the emphasis is not to complete it, but to learn from your partner through pair programming and practice TDD. Anyway I feel a need to improve on my Ruby basics, so I finish it anyway after the event, here’s my version running in the terminal in Ruby:

Screen Shot 2012-12-17 at 9.27.13 AM
A link to github for my messy (but at least working) source code:
https://github.com/worker8/Game-Of-Life/blob/master/game_of_life.rb

Some thoughts on pair programming and TDD experience
In the event, I got to work with 5 different person using Ruby, C#, Java and Javascript. So here’s my experience…

I’m very new to web programming and having only 2 months experience working on Ruby on Rails, I can handle simple bug fixes without problem on a day job. In the event, whoever got to pair up with me became the more experienced guy eventually, so I get to see how they write code (of course I couldn’t learn much in a short time, but I get to see their coding habits, and get some direct feedback).

Importance of the basics of a language
While working with the experienced partner, I noticed that I’m missing something very important, which is the basics! I realize that most of them seldom refer to the documentation. For me, I must have google for something within 10 minutes. It will increase the productivity in a long run by knowing the basics well. Example, the Array class, I did not know that there’s a count() method, so I’m using ‘each’ to for counting; another example, command for generating a migration script, I have to refer to Rails Guide every single time, so I’m making it a point to remember the basics well.

Ping-pong Pair Programming
Besides, we get to practice ping-pong pair programming with TDD, where one of us writes the test, and the another writes the implementation. I realize that I learn pretty fast this way (I’m not sure if the other person learn something by teaching me thou), because I’m guided directly by an experienced programmer.
Another thing that I realize while doing ping-pong programming is that I can visualize a problem properly from the top level on what I want to build and what to expect from the outcome. I’m the one who is writing the implementation, so while looking at the other person writing the test, I can visualize the problem better and eventually, the implementation became clearer and easier. This is an interesting fact that I didn’t thought of. From now onwards, even I’m not practicing TDD, I tend to write down what I want to achieve and the expected outcome before I jump right into writing code.

Strict TDD
In one of the session, we took a challenge to practice strict Test Driven Development, which is to write implementation just enough to pass a single test at a time. This is to prevent us from writing too much code that is either not needed, or not covered by the test. The experienced developer who paired with me often ask me to STOP! and hit F8 (to run the test) while I write too much than the coverage of the test. I got a taste of how it feels like, but I’m not sure how I could do this in my daily work.

Practicing In My Daily Work?
Is pair programming worth a try in our daily job? It certainly has it’s social aspect, where someone can be your live debugger and talk to you, and get you talking to a colleague that you normally don’t talk to. Learning from an experienced guy 1 on 1, will definitely speed up the learning process.

We might be able to cover our colleague’s back if they went for a vacation and there’s an emergency too. However, are 2 people working on the same thing going to decrease productivity instead? I’m not sure since I’ve never tried that yet…

Is TDD worth a try? I’m sure that TDD has many benefits, firstly, it will report any failures on any previously working code when we add in new features. Besides that, it makes us produce quality code from thinking thoroughly about how we should structure our code while writing the test. I watched the Unit Testing video from Misko Hevery, and he emphasizes that the key for doing TDD is to learn how to write clean & testable code. So while we practice TDD correctly, we will eventually be able to write clean and quality code. It will force us to think about the coupling of the code and write code that is easier to test.

Conclusion
This is some of the thoughts I have on pair programming and TDD for now after having a day of experience on an event, but I still new to all these and some of my understanding might be wrong… will blog about my new understanding as soon as I got them into my head. 🙂

TDD is definitely one of the thing I will look into soon.

That’s it for now, good night! 🙂

How to leave a task behind on the server to run

Recently, I need to run a huge crawling tasks on the server side, and since I couldn’t leave my ssh connection on and run the task for 100 hours, what if I tripped over the router and got discounnected?

So I considered delayed_job on Rails, but I ran into some problems that I couldn’t solve, so I found another work around to this problem which might be useful in other cases. The solution is using tmux or screen:

http://stackoverflow.com/questions/11190648/how-to-keep-rails-command-from-rails-console-running-after-ssh-client-putty-cl

Here’s how to do it:

  1. ssh into_your_server
  2. tmux
  3. (you should see the tmux screen)
  4. execute whatever you want to run here
  5. press Ctrl-b then d
  6. (you should be detached from the tmux now)
  7. ps aux |grep tmux (you should be able to see tmux is still running your task)
  8. (reattach with your task by) tmux attach-session